


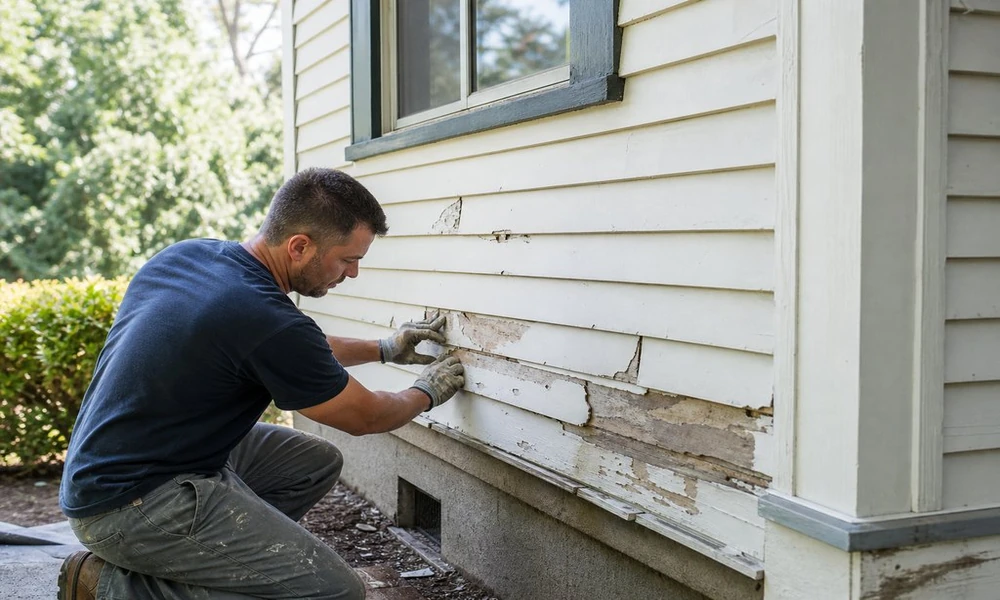
Exterior home renovation
An exterior renovation is a great opportunity to update the look of your home. But before pulling trim off walls or ordering new cladding materials, it pays to take a systematic approach to inspect, repair, and then make cosmetic changes, so the improvements hold up in future years.
As you start to plan the project, look for these signs of failures that might need to be corrected first: soft or broken trim boards, gutters pulling away from walls, cracks in mortar joints, warped boards, stains on the ceilings of rooms with exterior walls, or gaps forming around windows and doors.
Start with repairs to the roof and roof/wall transitions, as well as foundation drainage fixes, and other critical repairs before applying any fresh finishes to walls; the practical side of exterior renovations Miami starts there. Check penetrations for pipes, vent pipes, and electrical wiring to ensure they’re properly sealed. Address any rotted wood or sheathing under wall coverings before new cladding is installed. Rusted screws and loose railings shouldn’t be papered over by new paint either. It’s best to tackle all these items before any new finishes are applied.
Material Choices
When choosing building materials, consider more than just cost. Take into account long-term costs for care and repainting too, as well as how you want to maintain the exterior.
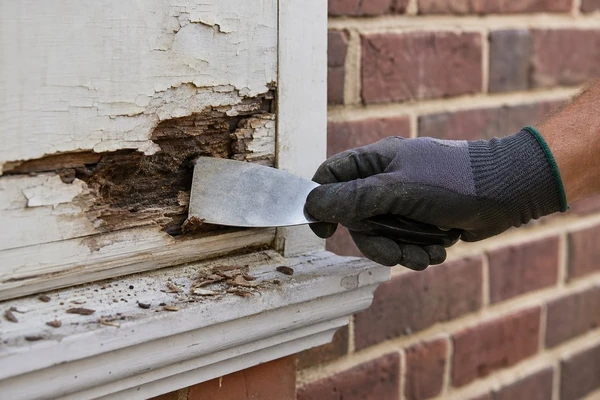
Exterior building materials
For instance, if you plan on painting, understand that old paint and coatings will need to be removed down to sound wood. Any rotten wood and cracks will have to be repaired before painting. Allow ample drying time and good weather before new paint is applied. Likewise, masonry usually won’t accept paint but may need to be repointed instead.
When you order new materials, consider how they expand and contract compared with existing materials, and how they’re fastened. Find out what maintenance is involved with each, whether parts are available to replace broken items in the future, and how long warranties are. Keep a sample or extra pieces of any unique siding, cladding, or trim items, to help with future repairs should the pieces go out of production.
Think about details, too. Trim boards, railings, and other wood parts should be detailed to shed water, and not trap it along the bottom or other horizontal surfaces.
Installation Details
The success of the new building materials and finishes will largely come down to the details, including flashing and sealants at the junctions of wall-to-roof transitions, decks-to-walls, doors, windows, and window trim. All should be properly flashed, waterproofed, and sealed. And trim and wall materials should be kept off the soil or mulch at their bottom edges. The amount of clearance required depends on the building material and local building code requirements, but the goal is to keep the wood out of damp soil, and away from insects and other pests.
Before beginning any Miami exterior project, make sure you are in touch with applicable building codes, including hurricane season and salt air exposure. For example, if your project includes replacing or enlarging shutters, door, garage door and glazing openings, new wind load requirements and impact resistant construction may apply.
Corrosion resistant fasteners, connectors and hardware should be used for exterior railings, especially in areas closest to the coast, to prevent early failures. Corrosion can hide in plain sight until it causes premature deterioration to even the best exterior materials.
Finally, don’t forget to look into permit requirements, and include any applicable historic-district or association approvals, before placing any orders for materials.
On coastal properties, make sure the building is designed/planned to protect against precipitation (driven by wind) at any opening, not just obvious gaps/cracks. Check that weep holes at windows are clear and that covers on outside outlets are weatherproof. Make sure irrigation is not sprayed onto walls/doors/fresh paint, trim, etc.
Project Preparation
The order of operations is important. Work should start with an inspection, and repairs to address moisture penetration and structural failures, before proceeding to window and other penetration removal and repair, wall surface preparation, cladding and other new exterior finishes, paint and other finishes, landscaping and lighting, and then to clean up.
Weather should also be taken into account when applying sealants and other finishes. These items usually require dry, clean surfaces, and temperatures in accordance with manufacturers’ instructions.
Before hiring a contractor or finalizing a project budget, document the existing state of the home with photos and take notes of any items that may need repair. Write out a project scope in as much detail as possible, and include allowances to address unexpected repairs as needed. This is also the kind of practical scope the team at Gaven Constructions encounters.
The contractor will be able to verify practical issues, such as where materials and dumpsters can be set, where gates may need to be opened for ladders and scaffolds, how to access utility meters, and other access issues including property lines. During a site walkthrough with the contractor, review where to stage building materials, and verify that downspouts are directing water away from the house (the EPA spells this out at www.epa.gov/soakuptherain) before scheduling the project.
